GCP Learning Series_ Cloud Functions

Introduction

Cloud Functions — FaaS ( Function as a Service ) / serverless compute service provided by GCP to handle events generated by GCP resources. It is fully managed service by GCP as shown below.

Developers don’t have to worry about administrative infrastructure

  • runtime environments
  • Security Updates
  • OS Patches
  • Scaling
  • Capacity

Developers can focus on writing softwares

Events, Triggers and Functions

  • Events — particular action happen in GCP ( file upload/archive, message published to pubsub)
  • Triggers ( Responding to an event )
  • Functions ( Functions associated with trigger to handle event )

Supported Events

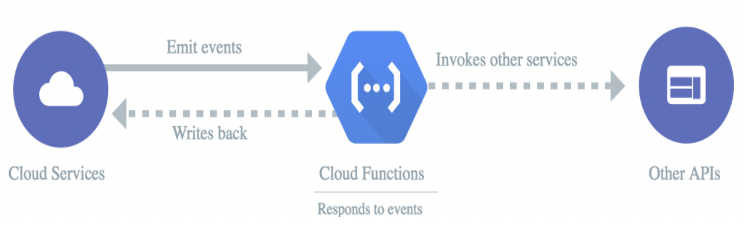
Cloud Functions support even based driven architecture for the events emitted in GCP. For the event, we can wire or tag a CF to trigger a API or an action as shown in below diagram. It does not support for all events in GCP. It supports below GCP resource events.

HTTP Events

Cloud Storage

Cloud Pub/Sub

Firebase

Cloud Firestore

The above resource events can be tagged into two categories

  • Background Functions ( Cloud Storage / Cloud Pub/Sub )
  • HTTP Functions ( Web hook / HTTP Requests )

Language Support

Cloud Functions support below languages

Node JS

Python

Go

Java 11

It does not provide support for containers yet. i.e docker images containerized can not be deployed into Cloud Functions.

Deployment of Cloud Functions

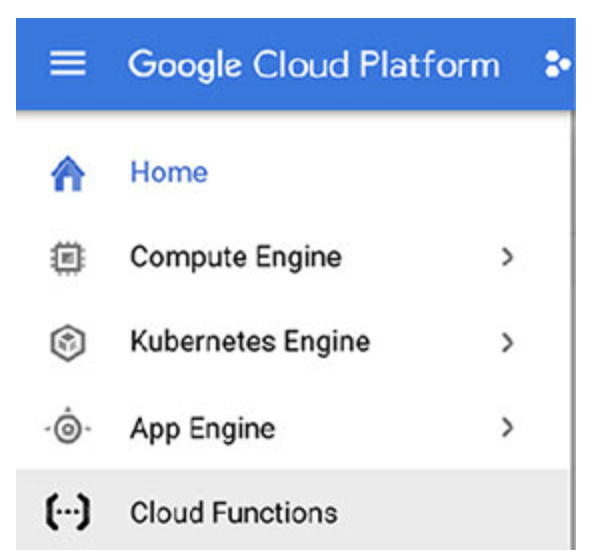
Login to Google Cloud Console and click on hamburger menu and choose Cloud Function to create /deploy cloud function

  • Provide Function name
  • Trigger
  • Event Type
  • Resource
  • Runtime

CF can be deployed using gcloud command also

To deploy Cloud Function to handle event when user uploads file into Google Cloud Storage, it can be deployed by providing resource name ( bucket name ) and resource event ( on file upload completion )

gcloud functions deploy cloud_function_test_gcs — runtime python37 — trigger-resource gcs-bucket-test — trigger-event google.storage.object.finalize

Similarly if we need to deploy cloud function to handle pubsub event, it can be defined as below

gcloud functions deploy cloud_function_test_pubsub — runtime python37 — trigger-resource test-topic

For cloud pubsub, there is only one event ( i.e message published ) on the topic, here it is test-topic.

Limitations

Cloud functions will timeout after one minute, although timeout can be configured to extend up to 9 minutes.

Hence cloud functions are suitable for handling events and should not be applicable for time consuming process.

#GCP #LearningContinues #Serverless

Thank You

Bharathy Poovalingam

Spring Data with Spring Boot

Introduction

This blog will show how to integrate Spring Data with Spring Boot. The flow will be from the Rest Controller which will wire the service to make call to JPA Repository as shown below.

Maven Dependency

Initialize the Spring Boot Application using start.spring.io with Web and JPA dependency added to it.

Need to add below dependency to support Spring Data JPA and embedded h2 database

  1. spring-boot-starter-data-jpa [ org.springframework.boot ]
  2. h2 [ com.h2database ]

Repository Changes

Define an interface that extends JpaRepository for the entity along with the primary key. Here, we have an Employee Entity and the primary key data type for the entity is String.

Service Changes

Inject the Repo as dependency in Service Layer and make use of findAll() method and getById method to return the list of employees or return a specific employee

Entity Changes

Define a model, that maps entity bean to a table.

Note : Please add @JsonIgnoreProperties to override below exception

com.fasterxml.jackson.databind.exc.InvalidDefinitionException: No serialiser found for class org.hibernate.proxy.pojo.bytebuddy.ByteBuddyInterceptor

Starter Changes

Need to add below annotation

  1. @EnableJpaRepositories
  2. @EnableEntityScan

SQL Changes

Place the SQL files in main/resources folder to load it into DB , on application startup

Config Changes

H2 Console Dashboard

We can able to access the H2 dashboard @ localhost:8095/h2-console ( Here the port no specified in application.properties should match )

And the JDBC URL should be : jdbc:h2:mem:testdb

Then click on test connection, to see its successful.

Testing

Test the endpoint through Postman

Happy Learning !

Bharathy Poovalingam

Configuring Swagger in Spring Boot Application

SpringBoot Initializr:

Initialize a Sample Spring Boot Application using Spring Initializr : https://start.spring.io/

Key in the Group, artifact id and the name for your sample project .

Choose your favourite language, it can be Java/Kotlin/Groovy.

Also choose the language version, Packaging option and the Project to be built in. It can be Maven or Gradle.

For this demo, I have Chosen Java 8 for language , Maven as a build tool and packaging as jar

Once you have clicked generate, it will generate a zip file with required dependencies been added to the pom.xml file. Import it as a Maven project in your IDE. I have chosen Eclipse for this demo.

Maven Dependency

Add the SpringFox Swagger Dependency as below to the pom.xml

Note: For Spring boot 3 version, adding “springfox-boot-starter” dependency is enough and we don’t need to add swagger ui dependency and also not to include @EnableSwagger2 in the starter class.

Then run command :mvn clean install to download the swagger dependency to your project.

Code Changes

To enable Swagger in the Spring Boot Application, need to make code changes in below sections

Spring Boot Starter Class

Need to define a Bean “Docket” to customize the Swagger Documentation. Say if we access the swagger UI : http://localhost:<<PORT_NO>>/swagger-ui/index.html. It will provide api docs for the controller been defined along with the error controllers. To restrict API definition to the controllers been defined in our application, need to have this docket Bean with the PathSelectors and RequestHandlerSelectors point to the controllers defined for our application as below. Here I restrict the scan to the package “com.nikki.demo.controller” to scan for this controller package

Spring Rest Controller

Then to have the controller APIs to display more additional information about the endpoint been exposed, can add API operation annotation to it.

Here each endpoint been annotated with @ApiOperation to give more details about the endpoint

Accessing the Swagger UI

Then, hit the Swagger UI as below ( after running your application as mvn clean spring-boot:run )

Happy Learning !

Bharathy Poovalingam

https://www.linkedin.com/in/bharathy-poovalingam-09ab681a/